Learning how to use your gears is the first step to a smoother and more enjoyable ride.
A 6 speed Brompton can seem a little daunting at first, especially if you’ve never used gears or haven’t ridden a bike for quite a while. Rest assured; changing gears is really easy to get the hang of once you understand what’s happening – and with just a bit of regular riding.
In this post we’ll explain:
how the gears on 6 speed Brompton work;
how to change up and down the 6 gears; and
when to change gears for a smoother and more enjoyable ride.
Why are there two shifters?
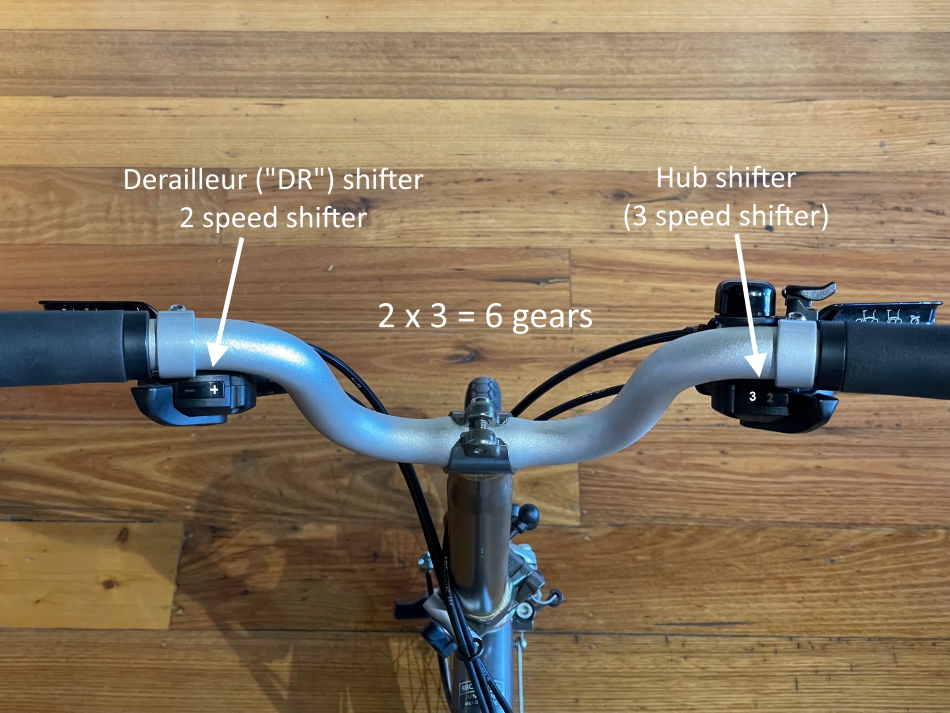
Having two shifters is not unusual. On a Brompton the left hand shifter controls your derailleur (2x sprocket) gears and the right hand shifter controls your hub (3x internal) gears.
The right-hand shifter highlights either 1, 2 or 3 as you use the lever to change between gears. You can’t see the gears themselves as they’re inside the hub of your rear wheel. What you will notice is that little chain that feeds into the nut with the hole in it moves in and out as you change up and down gears.
Hub gears can be changed whilst the bike is stationary. This is a great feature on a commuter bike. It means that if you come to a stop quickly (eg at a set of traffic lights) you can change to a more comfortable gear to get rolling again.
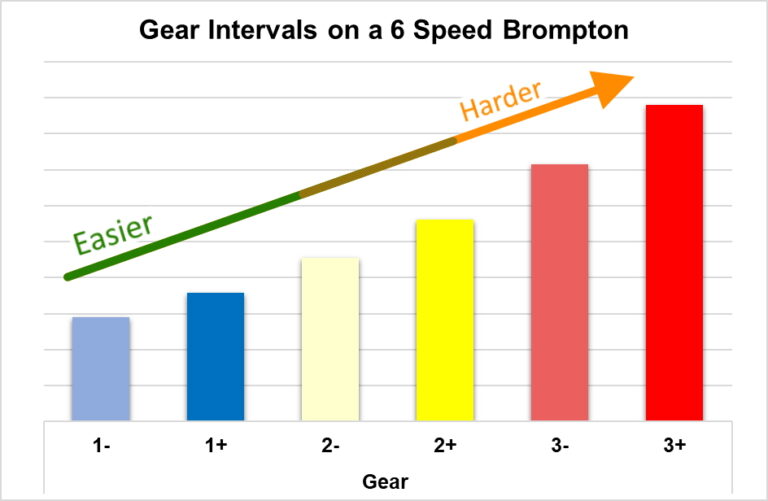
The jumps between each of the hub gears is quite large; like taking every second step on a flight of stairs.
1 = your easiest gear. Use this to get rolling from a standing start.
2 = your cruising gear in most situations.
3 = your “go fast” gear.
The left-hand shifter highlights either + or – as you use the lever to change between them. Changing gears with your left shifter moves the chain between two small sprockets on the rear axle.
When only using the +/- shifter to change gears, the jump between gears is smaller; like stepping up/down just the one easy step.
+ = faster/harder option
– = slower/easier option
In the above graph the numbers indicate the hub gear and the symbol indicates the derailleur gear. For example 1+ means you’re in your first hub gear (right hand shifter) and on your faster sprocket (the + symbol on your left shifter). The length of the bar indicates how far you would travel for one revolution of the pedals.
Imagine for a second that the graph only showed the + gears (i.e. 1+, 2+ and 3+). The jumps between the gears are really quite steep! This is what your ride would be like if you only used your hub shifter, and never your DR shifter.
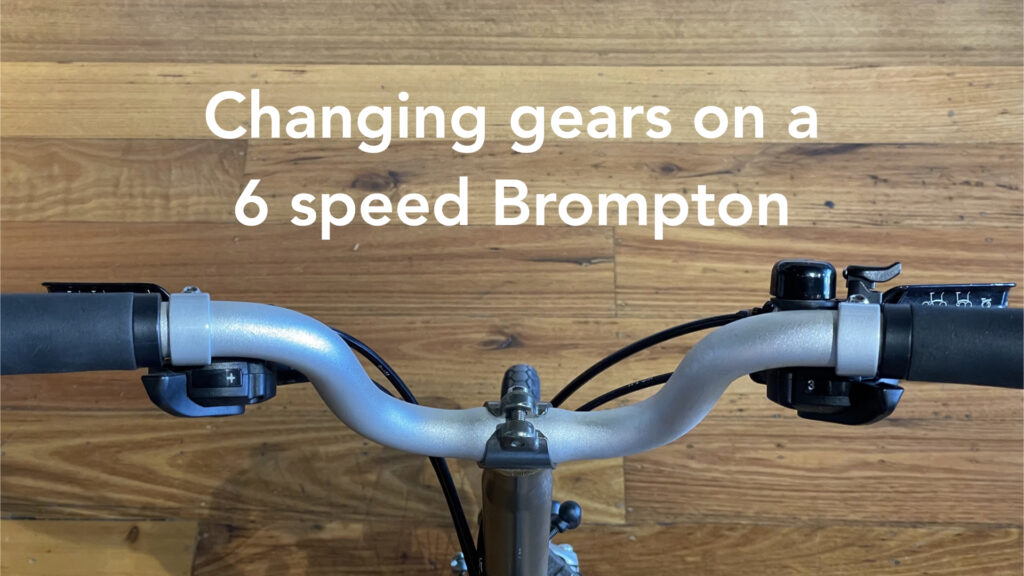
How to change up and down gears
Using each shifter is as easy as flicking the lever on the shifter inwards to go faster, or down/outwards make pedalling easier. It’s the same idea for both shifters.
You may need to use both at the same time. Here’s a short clip demonstrating how to move up and down each of the six gears consecutively.
If you have over-bar shifters (pre 2017), the principle is exactly the same. The main difference here is that you can see and feel which gear you’re in as the lever doesn’t return to a neutral position each time.
Now that you understand the mechanics of how to change gears, the next step is understanding when to change them. (This is the fun part – you get to ride!)
Getting started
Changing gears is not simply about going fast or being able to ride up steep hills. It’s about riding comfortably and efficiently for a more enjoyable ride.
By learning to use your gears, you can always be in the most comfortable gear. Exactly which gear that is will depend on factors such as:
Road/path surface – rough gravel or long grass will take more effort to ride over than smooth bitumen.
Incline/decline – gravity is a force to be reckoned with!
Weather conditions – may the wind always be at your back!
How “bike fit” you are – different types of exercise require different muscles and movements. You might be able to run a marathon, but may not be able to ride 10km on a bike.
A reminder from earlier:
1 -/+ = your easiest gears. Use this to get rolling from a standing start.
2 -/+ = your cruising gears in most situations.
3 -/+ = your “go fast” gears.
If you’re pushing too hard (“grinding”), change down a gear or two. If you’re pedalling like a hamster, change up.
Quite often 1+ is a good option to be in when you’re pushing off from a standing start. It’s a gear that’s easy enough to get you moving without much effort. (If you find another gear works better for you – go for it!)
You can move up your gears consecutively until you reach a comfortable cruising speed. If you gain very speed quickly (eg you’ve got a strong tail wind), you can just use your hub gear shifter to get you into a high gear faster.
When it comes to changing down gears, it’s the same principal – but in reverse. If you’re on a gentle incline, you might need to change down a gear by using just your DR shifter, or possibly both shifters. If the incline is a bit steeper, you may need to shift down more than one gear for a quick change.
“My Brompton won’t shift down.”
The golden rule that you need to remember is don’t put pressure down on the pedals when you’re changing hub gears. Shifting under load will cause damage to your hub gears.
How do you avoid this situation? When you’re on an incline and about to shift down, put in a hard pedal or two to get some momentum up, then relax pressure (lift your foot for a spilt second if necessary) as you change down. Once the gear has shifted you can keep pedalling to get to the top of the hill.
With practice you’ll be able to time exactly when you need to change, and you won’t even have to think about changing gears – you’ll just do it.