How To – Brompton Suspension Block

As your Brompton ages you can expect rubber and plastic parts to slowly deteriorate through usage and UV exposure. After nearly eight years of use it was time to replace my suspension block!
Brompton Suspension Block pre-2018 Firm
New suspension block (pre-2018 firm version) fitted to my Brompton. (I forgot to take a 'before' photo with the old block.)
As my principal commuter bike, this one has certainly done a number of kilometres (>16,000km/10,000mi) over all manner of terrain, all weather conditions, and usually carrying reasonably heavy loads.
Old Brompton suspension block with cracks starting
Cracks in my 8 year old suspension block.

Deterioration of the suspension block is something we routinely check for when servicing Bromptons – particularly those more than a few years old. Like any rubber exposed to the elements (think of window and door seals around your home, or on old cars) UV hardens the rubber and it becomes less flexible, leading to these cracks. A replacment suspension block is not expensive and easy enough to do for yourself if you have a 10mm spanner and grease suitable for rubber components.

Old versus new Brompton firm suspension block
The rubber isn't just visually different, the old one feels more like plastic than the solid rubber feel of the new one
Firstly you need to remove the nylock nut and washer that holds your suspension block to the rear frame/triangle. Half-park your Brompton to do this, or if you have a work stand, support the rear wheel as you loosen the nut.
Every time I ride my bike (particularly when I go over a bump) the suspension block is compressed and the well-greased bolt is pushed further through the hole. The grease left behind took a bit of work to clean off! The other side (shown cleaned) more clearly shows how the action of the bolt is wearing a groove into my frame. 
The triptych above shows the bolt that both holds your rubber suspension block onto the frame. The dashed green polygon indicates where the rubber block fits. The grease in the first photo is a bit grotty, but it was performing well enough. If your suspension block starts squeaking it could be that you don’t have enough grease, or it’s dried out or been washed out. The second photo clearly shows where the bolt has been rubbing against my rear frame (making what started as a round hole into a keyhole shape). You can also see where your rear frame clip latches under the head of this bolt and holds your rear frame to the main frame when unfolded. Please note that the white washer is shown correctly in the second photo (it’s upside down in the first photo). The third photo shows the same bolt with new grease on the shaft (not the thread) ready for reassembly.
Before assembling the parts, I needed more plastic washers. These sit between the rubber block and the rear frame (I’d discarded the previous ones before taking a photo). These are easy to make out of any thick(ish) plastic bag or packaging you might be able to find around the hole. Use soft flexible plastic (eg a bag) rather than hard plastic (eg fruit container). Simply use the larger end of the suspension block to trace a circle, cut two out and a hole in the middle for the bolt to poke through.
Making plastic washers for the Brompton suspension block
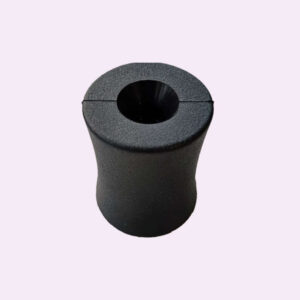
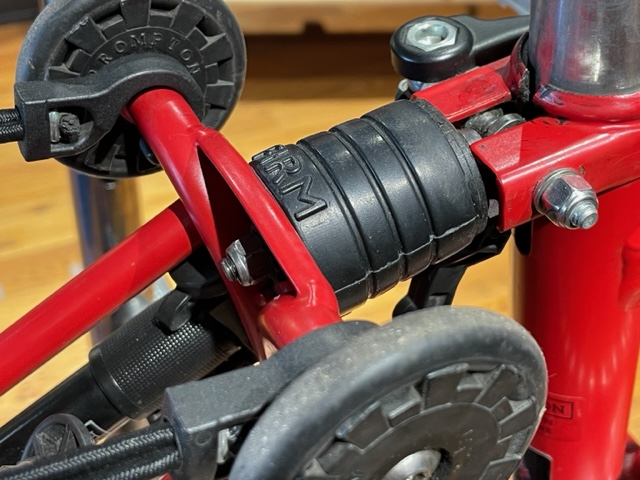
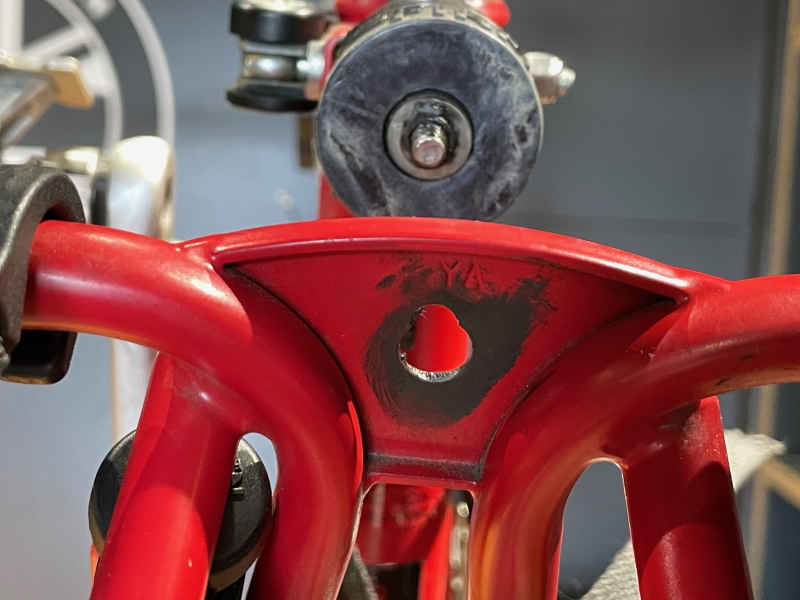
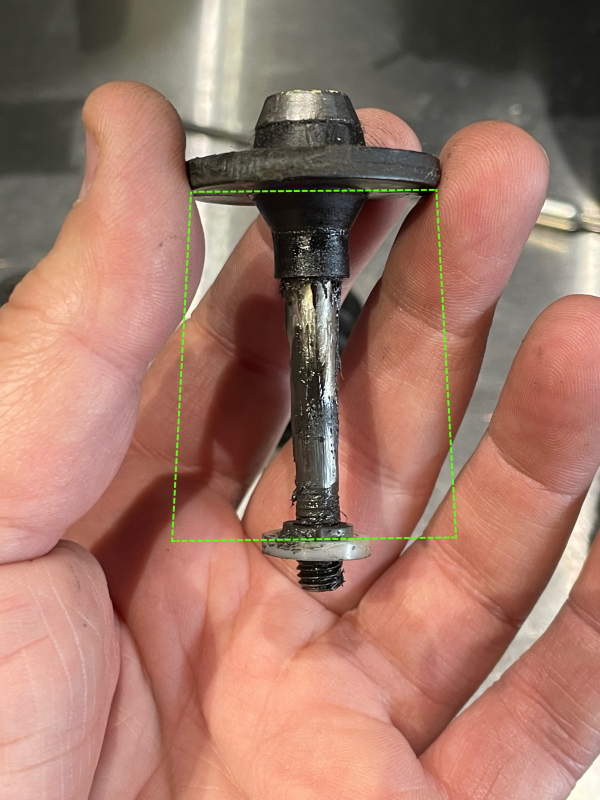
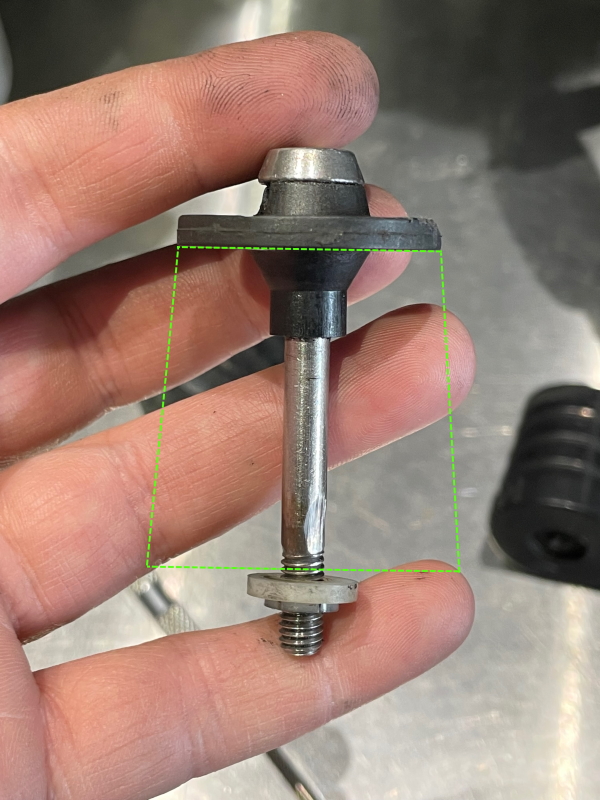
Now you’re ready to reassemble. Insert the rubber suspension block onto the bolt, followed by the white washer (orientated as shown below), and lastly the plastic washers. Back to your bike, insert the bolt through the frame, slip on the washer and get the nylock nut started on the thread of the bolt. Hold the hard plastic or head of the bolt, rather than the rubber suspension block, to assist here.
Reassembling the Brompton suspension block parts
Plastic washers
Once you have some tension on the bolt you may be able to use the rear frame clip to hold everything in place. Tighten until 2-3 threads of the bolt stick through the nylock nut. If your rear frame doesn’t reliably click in, check that this nut is sufficiently tightened – they do gradually loosen off.
Suspension Block - reassembled on a Brompton
Ensure a couple of threads are showing behind the nylock nut
Check that the notch in the plastic end plate is vertical so that the rear frame clip will be able to click in and release. If it’s not, and you can’t turn this easily by hand, loosen off the tension on the nylock nut, straighten, and re-tension the nut.
Notch in Brompton suspension block
Current suspension blocks (2018-) are available to purchase. These are available in ‘standard’ firmness only, which is similar to one shown above. I was happy to replace like-for-like on my own Brompton (i.e. the pre 2018 Firm Suspension Block). If you find your suspension block too hard (more often the case for smaller people) you may like to try a standard (aka ‘soft’) <2018 suspension block.
Current (2018-) Brompton suspension block
Scroll to Top